The QUATTRO is one of the most flexible, efficient and compact lasers on the market. Many metal working companies have a large number of components to manufacture but only need to produce one or two at a time. Ease of use, plus low operating costs make the QUATTRO the ideal solution for low volumes, without forgoing precision and quality.
This machine is no longer available.
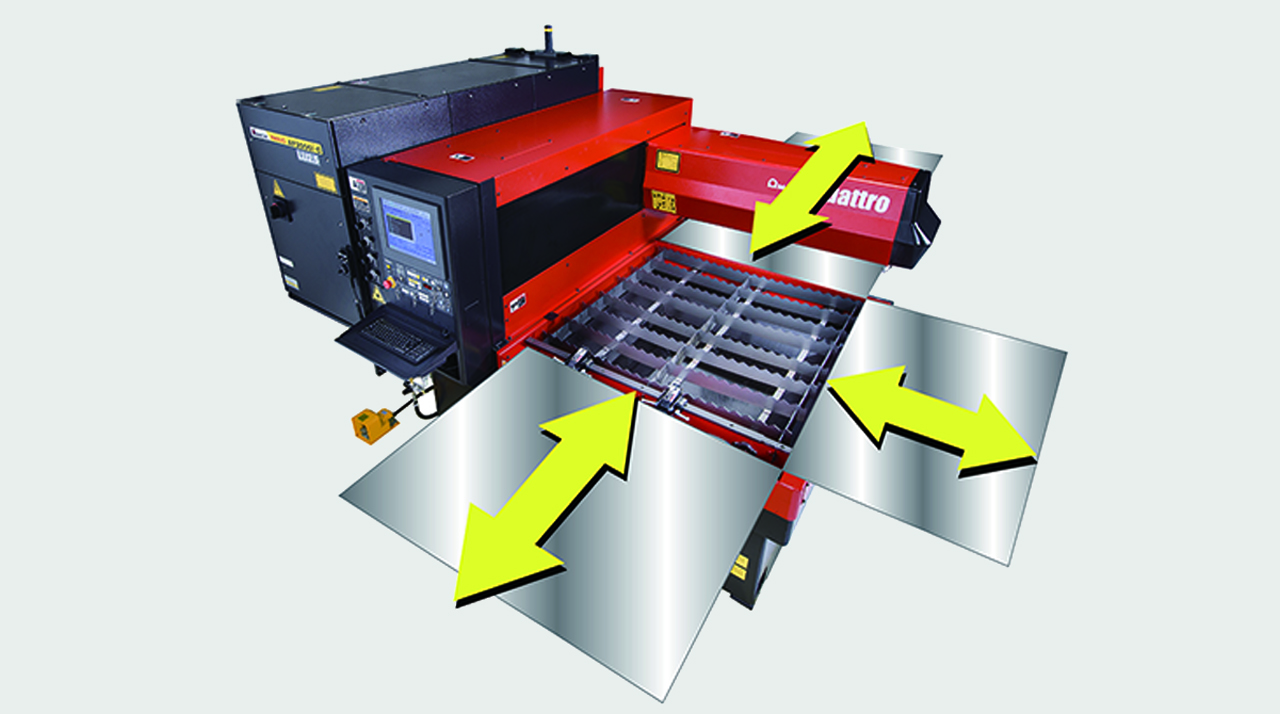
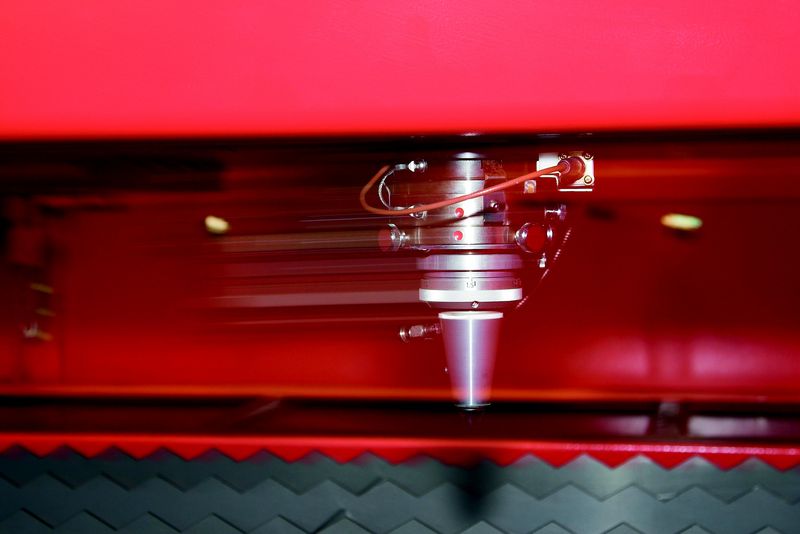
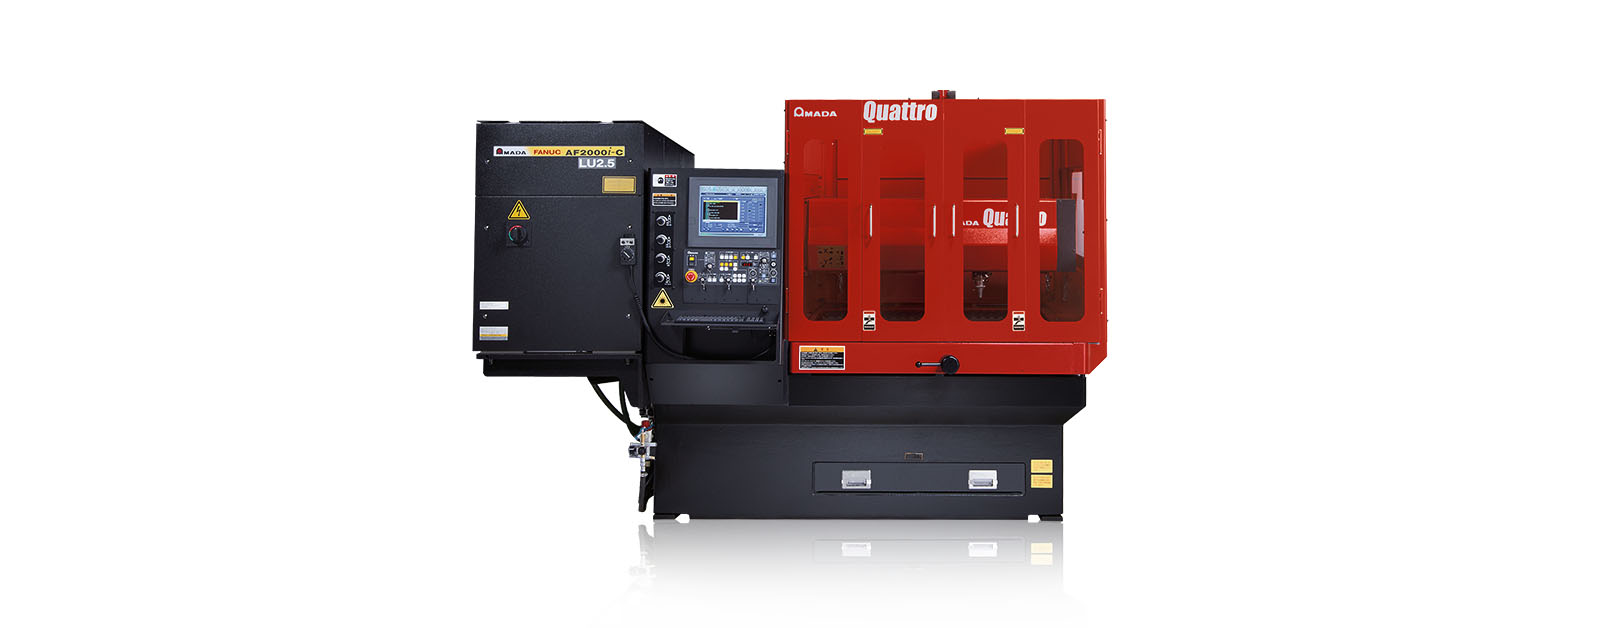
FULL ACCESS TO THE CUTTING AREA:
The three accessible sides of the QUATTRO laser facilitate sheet metal loading and unloading. Large-sized sheets which are bigger than the work area can also be processed, repositioning them manually.
COMPACT STRUCTURE:
With a footprint of just 6.4 m2, the QUATTRO is AMADA's smallest laser. The oscillator and numerical control are contained within the machine to maintain its extremely compact size.
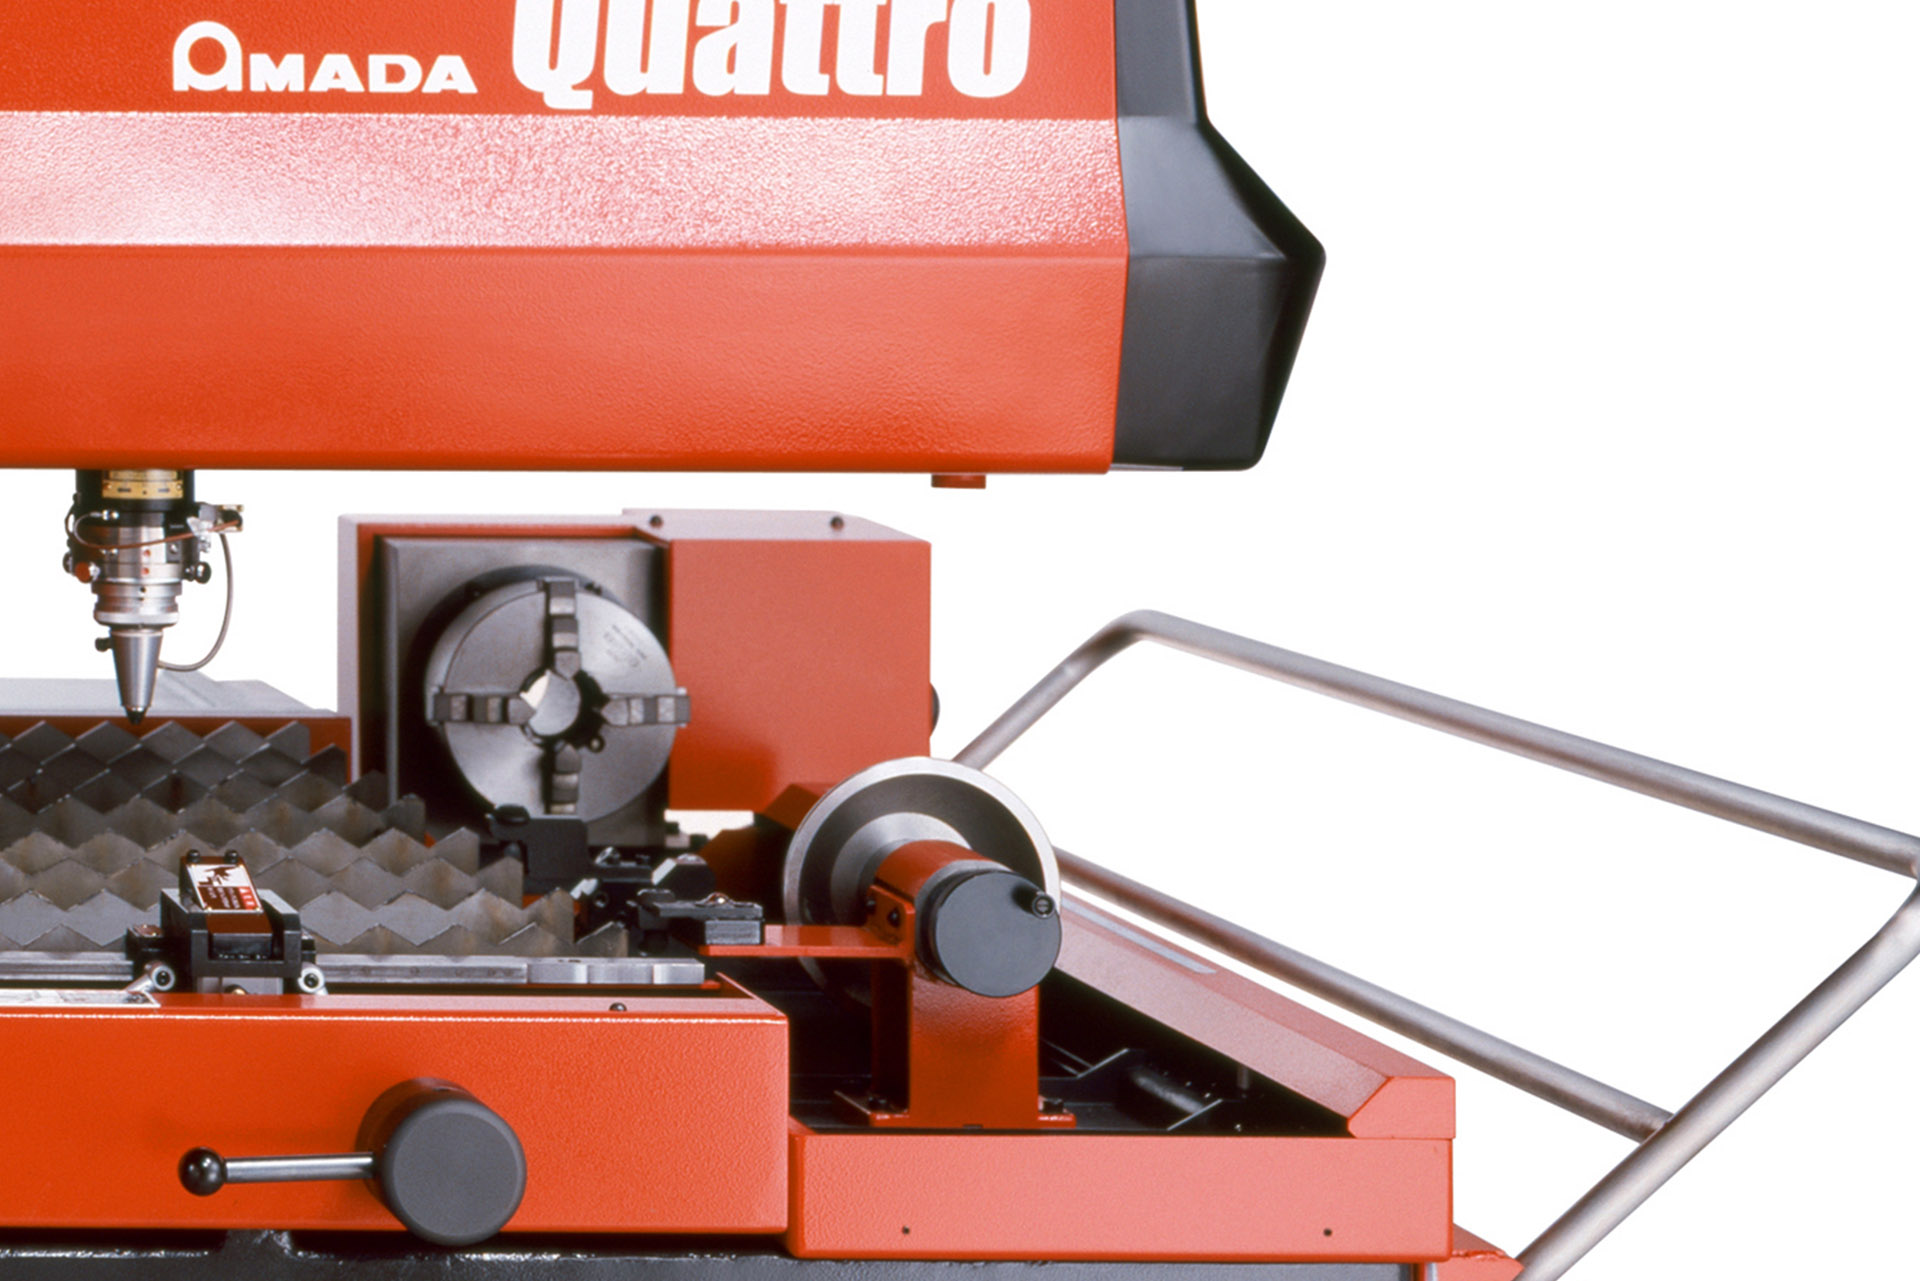
DIVERSIFIED PROCESSING:
With the QUATTRO, not only sheet metal but rectangular and square tubes can be processed, providing even greater flexibility. (Option)
FULL ACCESS TO THE CUTTING AREA:
The three accessible sides of the QUATTRO laser facilitate sheet metal loading and unloading. Large-sized sheets which are bigger than the work area can also be processed, repositioning them manually.
COMPACT STRUCTURE:
With a footprint of just 6.4 m2, the QUATTRO is AMADA's smallest laser. The oscillator and numerical control are contained within the machine to maintain its extremely compact size.
DIVERSIFIED PROCESSING:
With the QUATTRO, not only sheet metal but rectangular and square tubes can be processed, providing even greater flexibility. (Option)
| QUATTRO | QUATTRO | |
|---|---|---|
| Laser power (W) | 1000 | 2500 |
| Machine type | CO₂ flying optic laser | CO₂ flying optic laser |
| Working range X x Y (mm) | 1250 x 1250 | 1250 x 1250 |
| Working range Z-axis (mm) | 100 | 100 |
| Table loading weight (kg) | 80 | 160 |
Material thickness (max.)*: | ||
| - Mild steel (mm) | 6 | 12 |
| - Stainless steel (mm) | 2 | 5 |
| - Aluminium (mm) | 1 | 4 |
Dimensions: | ||
| Length (mm) | 2900 | 2950 |
| Width (mm) | 2450 | 2450 |
| Height (mm) | 2160 | 2160 |
| Weight (kg) | 3750 | 4150 |
* Maximum thickness value depends on material quality and environmental conditions
Technical data can vary depending on configuration / options
Please contact us for more details and options or download our brochure

For your safe use.
Be sure to read the user manual carefully before use.
When using this product, appropriate personal protection equipment must be used.

Laser class 1 when operated in accordance to EN 60825-1
Apply degreaser to the chain, cassette, and front chainrings. Scrub with a stiff brush and rinse with low-pressure water.
The Carrera Vengeance remains one of the most popular entry-level mountain bikes on the road and trail today. Whether you are tackling a muddy singletrack or commuting to work, knowing how to maintain, adjust, and repair your bike on the go is essential.
Carrera Vengeance Mens Mountain Bike - Black - XS, S, M, L, XL Frames
Using a stand makes referencing the manual’s torque settings much easier—no more lying on the ground.
Never store the bike with hydraulic brakes (if equipped – note most Vengeance are mechanical) with the wheel removed for long periods without a pad spacer. Mechanical brakes are more forgiving, but keep the lever taped in the “open” position. carrera vengeance mountain bike manual portable
2 – 3 Nm (just tight enough to remove headset play) Brake Levers & Shifters: 4 – 5 Nm Frame & Seating Seatpost Clamp: 5 – 7 Nm Saddle Rail Clamp: 12 – 14 Nm Wheels & Drivetrain Front & Rear Brake Calipers: 6 – 8 Nm Disc Brake Rotors (6-Bolt): 4 – 6 Nm Pedals: 35 – 40 Nm (requires high force) 🛠️ Step-by-Step Portable Maintenance Manual 1. The 60-Second Pre-Ride Safety Check
Release the lever and spin the wheel to check for clearance. Derailleur Indexing (Smooth Shifting)
If you want to the Carrera Vengeance: 👉 Download the official Halfords PDF manual, then print only the 4–6 pages covering:
For quick on-trail adjustments, keep these key specifications in your "manual" notes: Apply degreaser to the chain, cassette, and front chainrings
Carrera bikes are sold exclusively by (UK). The owner’s manual is generic for Carrera mountain bikes but covers the Vengeance.
The causing issues (brakes, gears, suspension) What tools you currently have available on hand
If the chain jumps or hesitates when shifting on your Carrera Vengeance, the cable has likely stretched.
The Carrera Vengeance manual includes a diagram of the correct fork spacer installation when removing the front wheel. Always insert a spacer between the fork legs to prevent damage during transport. Whether you are tackling a muddy singletrack or
Turn the barrel adjuster clockwise (releasing cable tension).
Remove the punctured inner tube. Inspect the inside of the tyre casing carefully for thorns, glass, or wires.
Release the lever and spin the wheel. If it still rubs, visually inspect the gap on either side of the rotor and manually nudge the caliper before tightening. How to Index Your 8-Speed Rear Derailleur