9196
Commits
248
Contributors
2561
Forks
4035
Stars
Once you have your images, the software streamlines the merging process:
For optimal results, ensure that your images meet the following requirements:
The Ultimate Helicon Focus User Guide: Master Focus Stacking
An optional utility panel for adding watermarks, metadata, or calibration scales directly onto your image. 3. Step-by-Step Workflow: Rendering a Stack Step 1: Import Your Images
Electronic rails (like the Helicon FB Tube or Cognisys StackShot) physically move the camera forward in micro-steps. This is the gold standard for high-magnification extreme macro work. helicon focus user guide
The Radius slider tells the software how large of an area to analyze when determining if a pixel is in focus.
This determines how large of an area the software looks at to analyze sharpness. A lower radius preserves fine details but may introduce noise. A higher radius smooths out the image but can cause halos around edges. Start with the default value (usually around 4 to 8) and adjust based on your results.
: Use internal tools to clean up "ghosting" or areas where the algorithm failed to choose the sharpest pixel.
user wants a long article about "helicon focus user guide". This likely refers to Helicon Focus, a software for focus stacking. I need to provide a comprehensive guide. To gather the necessary information, I will search for official user guides, tutorials, reviews, and FAQs. I'll structure the article with an introduction, installation instructions, step-by-step usage, advanced features, tips, and troubleshooting. The search queries are designed to cover these aspects. search results provide a good starting point. I have links to the official user guide, tutorials, reviews, tips, troubleshooting, and keyboard shortcuts. I will open these pages to gather detailed information for the article. opened pages provide a wealth of information. The official user guide page (result 6) has a link to the online user guide. The Helicon Focus Help page (result 1) seems to be about Helicon Remote. The Helicon Focus 8 User Guide (result 4) is very detailed. The retouching labs review (result 2) provides an overview. The "Using Helicon Focus to Best Advantage" article (result 7) gives tips. The "Quick Start" page (result 8) outlines the basic workflow. The DPreview thread (result 3) offers tips on movement compensation. The Bilibili article (result 14) provides autoadjustment settings. The nature photographers network thread (result 15) discusses ghosting. The tutorials page (result 16) lists video tutorials. I also need to search for "retouching" and "3D model" features. have gathered sufficient information to write a comprehensive article. I will structure it with an introduction, sections on getting started, the three rendering methods, autoadjustments, retouching, 3D model export, tips, troubleshooting, and a conclusion. I will cite the sources appropriately. is a comprehensive user guide for Helicon Focus, designed to help you master focus stacking from the basic workflow to expert techniques. Once you have your images, the software streamlines
Whether you shoot stacks or use an automated focus rail/internal camera bracketing ?
Once you've loaded your images, you need to adjust the focus stacking parameters. These parameters include:
The defaults are 3305 (Vertical 3%, Horizontal 3%, Rotation 0°, Scale 5%). This is a good, safe starting point. The goal is to use the smallest possible values for maximum sharpness. If you have a high-end, rigid setup, you might try 1102 or even lower. Conversely, if you are shooting handheld or on a less stable rig, increasing these values can rescue a stack.
This gives the software more data to work with, resulting in less noise and better detail. This is the gold standard for high-magnification extreme
To start working with Helicon Focus, you need to load the images you want to stack. You can do this by clicking on the button and selecting the images from your computer. Helicon Focus supports a wide range of image formats, including JPEG, TIFF, and PSD.
Any camera movement between frames will cause alignment errors.
Low Smoothing: Keeps details incredibly sharp but can look jagged.
When it comes to rendering macro, landscape, or microscopic images with pin-sharp clarity from foreground to background, is the industry standard software. This comprehensive guide will walk you through everything from camera setup to advanced post-processing workflows. 1. Understanding the Focus Stacking Workflow


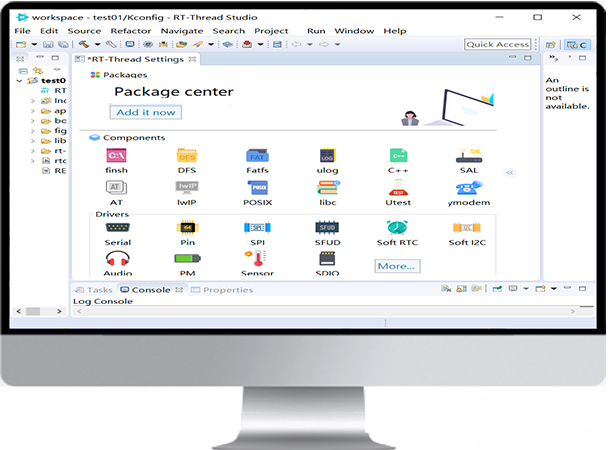
RT-Thread studio is one-stop development tool, it has easy-to-use graphical configuration system and a wealth of software packages and components resources, which makes IoT development simple and efficient.
News

Blog
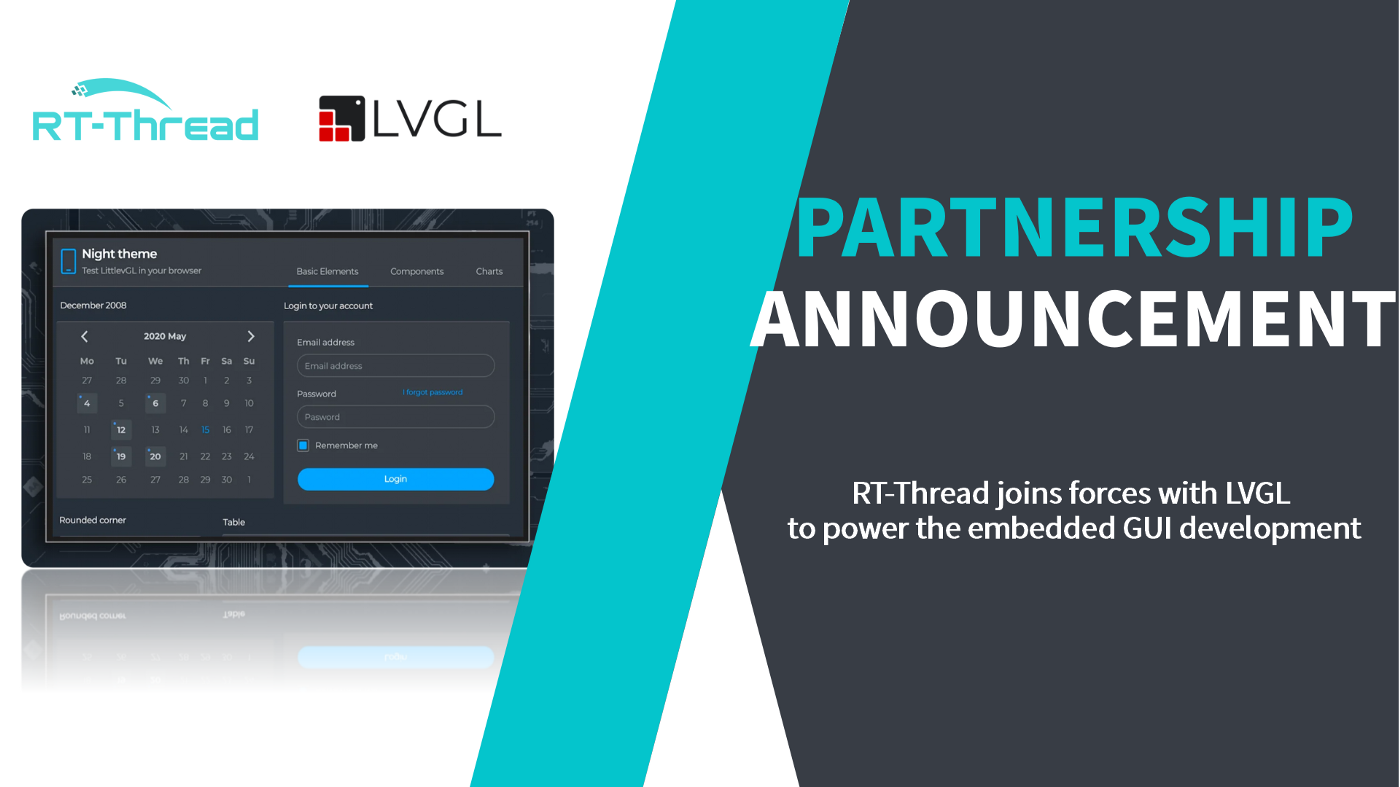
● This project is working with RT-Thread v4.1.0, the latest LVGL graphics libraries can be supported through simple configuration, LVGL graphics libraries are added to the project as a package!

Announcement