Remove water from your iPhone speaker in seconds. This quick and safe tool helps you expel water from the speaker grill of your iPhone to restore clear audio and protect the functionality of your device.


It is a custom iOS shortcut developed to remove water and dislodge dust from the iPhone and iPad speakers. It works by playing a low-frequency sound that helps push water and dust out of the speakers, helping keep the audio quality intact.
Unlike the Apple Watch, the iPhone does not have a built-in water ejection feature. However, iPhone users can still use this helpful function through a custom-developed tool, called Water Eject Shortcut, that is simple and convenient to use.
Below is a complete step-by-step guide on how to add the Water Eject feature to your iPhone:
Open your iPhone's web browser and download the Water Eject Shortcut from the button.
Tap the link on your iPhone. It will automatically open in the Shortcuts app (pre-installed on iOS, or you can download it for free from the App Store). The Shortcut will be installed instantly on your iPhone.
When the Shortcut page opens, tap the 'Add Shortcut' prompt when it appears.
Open the Shortcuts app, search for Water Eject, and click on it to activate the shortcut or simply say, 'Hey Siri, run Water Eject.'
Finally, tap 'Begin Water Ejection' to start removing water from your iPhone's speakers.
Imagine you're enjoying a coffee or a cold drink while scrolling through your iPhone. Suddenly, your hand slips and liquid spills onto your phone, leaving the speakers wet and sound muffled. Moments like this highlight why having a Water Eject Siri Shortcut on your iPhone can be incredibly useful.
Here's why it is a must-have shortcut for iPhone users:
The shortcut expels water and dust from your iPhone and iPad speakers in a short time. Its low-frequency sound ensures efficient water removal while protecting your device's speaker quality.
Using the shortcut is quick and easy. Simply tap the Shortcut or say, 'Hey Siri, Run Water Eject' and it will start removing water and dust from your iPhone or iPad instantly. There is no complicated setup involved - just a one-tap solution to restore your audio in a few seconds.
Unlike the Apple Watch, which has a built-in water ejection feature, iPhones don't have such an amazing tool. You can not find it in the Shortcuts Gallery; instead, it is custom-developed, especially for iPhone users.
The iPhone Water Eject is completely free to use. You can download it easily through the iCloud link and start using it immediately - no subscriptions, hidden fees, or in-app purchases required.
Dry your phone first using a towel or cloth to remove excess moisture before activating the shortcut.
Run Water Eject multiple times if needed to remove stubborn water or dust particles that may require a second or third run for better results.
Use the Shortcut with Siri by saying, Hey Siri, run Water Eject' for faster and emergency access to the Water Eject feature.
It's recommended to add the shortcut to your phone's Home Screen. For that, click the 3 dots and select 'Add to Home Screen' for quick, one-tap access whenever required urgently.
Great shortcut, easy to install, does what it says. Happy with it.
Never writing a review but this one deserves it. Saved my iPhone's speakers twice this week alone.
Why doesn't Apple just build this in? Until they do, this shortcut is the next best thing.
Downloaded today, tested it, love it. Adding to the ever-growing list of shortcuts I can't live without.
Tested with a few drops of water intentionally. Cleared it up fast. Good to know it works.
Phone fell in dog's water bowl. Ran this three times and it sounds perfect now. Five stars!
Download the Water Eject Shortcut now. It's free, safe, and takes seconds.
Download Free ShortcutUltimate Guide to Autocom 2020.23 Installation and Password Troubleshooting
Open VMware, select , and target the 2020.23.vmx file inside the extracted folder.
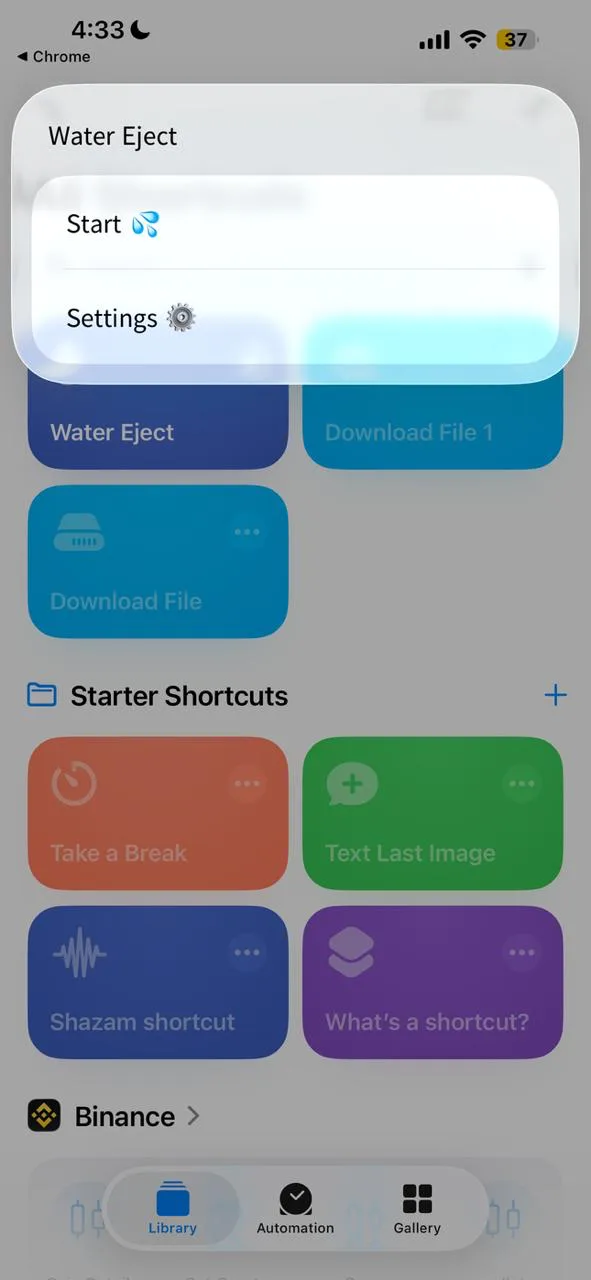
Right-click on Autocom_2020.23_Setup.exe → . Why? The password prompt grants access to system registry keys that standard user mode cannot modify.
The software will process the file, validate the registration, and open the main diagnostic interface. Step 4: Driver Installation and Hardware Connection autocom 2020.23 password installation
To ensure a successful installation of version 2020.23, several environmental factors must be met:
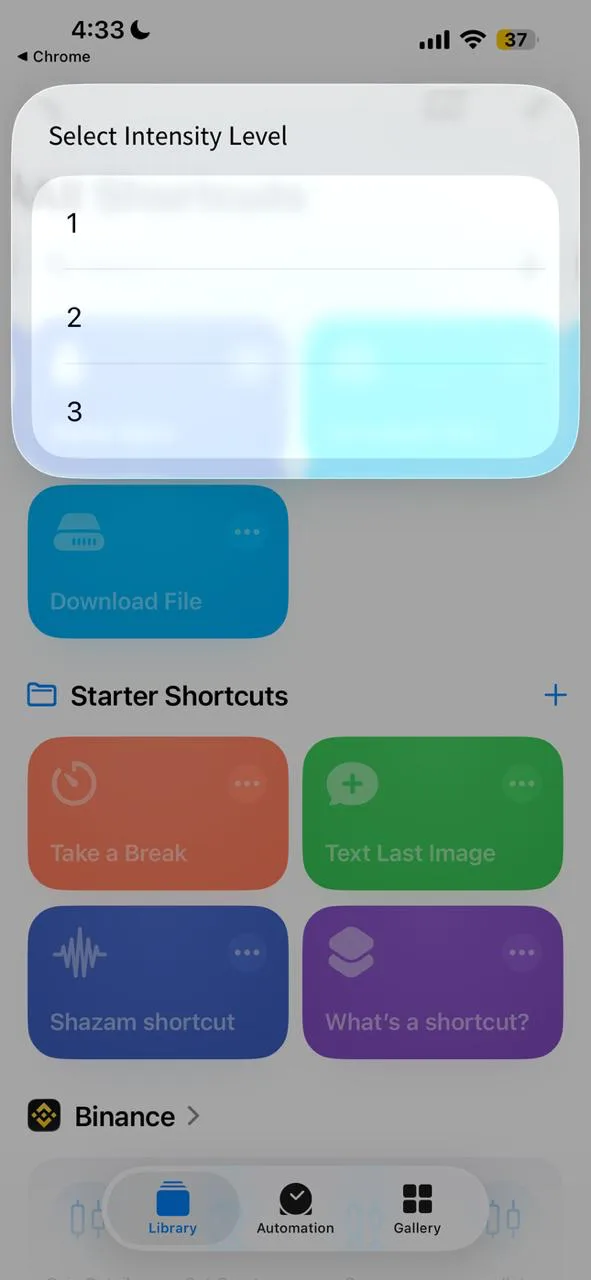
Enter any standard email address structure when requested by the startup splash screen.
Autocom 2020.23 is part of the Autocom and Delphi diagnostic software family, designed to offer extensive vehicle coverage. The software supports diagnostics for: Ultimate Guide to Autocom 2020
Autocom 2020.23 represents a significant diagnostic software version for automotive professionals working with the Autocom CDP+ interface. Whether you are a professional mechanic, diagnostic technician, or automotive enthusiast, this guide provides comprehensive information about installing and activating Autocom 2020.23.
The car’s door opened on its own. Inside, the driver’s seat was empty. But a child’s car seat sat in the back, its harness buckled around nothing.
Got your password ready? Launch that installer and get back to diagnosing. The password prompt grants access to system registry
Leo backed away. But the garage door was already closing. The laptop’s webcam light blinked red. And the chrome BMW’s engine turned over once—not with a roar, but with a soft, synthesized voice that spoke in perfect Spanish:
Leo Vasquez, the sole proprietor of Vasquez Auto Diagnostics , had been waiting for this file for three months. His old Autocom interface, a dusty workhorse from 2015, had finally given up the ghost—unable to talk to the CAN bus of any car made after 2022. The new one, a cloned blue board he’d bought for $300 from a Serbian supplier known only as "Dusan," had arrived last week. But the firmware was locked. And Dusan had just sent the key.
There are two primary methods to install and run Autocom 2020.23.
Follow these sequential steps closely to bypass structural installation loops and license rejection warnings. Step 1: Pre-Installation Security Configuration